
Hey everyone! Hope you're all having a good day and thanks for stopping in to checkout my latest "How-To"! Now most people who actually know me personally know I own a business that re-purposes up-cycled liquor bottles into tumblers, vases, candle holders, shot glasses, bowls, ect... Well now I've decided to share with you how you can make two cool candle holders (they're electric, normal candles will just go out because don't get enough oxygen) and a nice planter for your table centerpiece made from two wine bottles and an empty jagermeister bottle! Yes this project will require some power tools but unlike my other projects so far it doesn't require much. There's many ways to cut a bottle but I've found the easiest, fastest, and most successful way is to do it using a tile saw equipped with a glass cutting blade, here's how it's done!
But first, supplies.
Supplies/Tools Needed
Tile Saw
Husqvarna Diamond Blade - FOR GLASS (they carry blades for a lot of different applications)
80 grit sand paper
Husqvarna Diamond Blade - FOR GLASS (they carry blades for a lot of different applications)
80 grit sand paper
Tape Measure
"Bombay Mahogany" Stain and Seal
Semi Gloss (Optional if you want to make your base slightly more shiny)
Disposable Foam Brushes
Gloves (latex or rubber)
Respirator
Plaque Board of Wood (my personal choice but to each their own).
Juicy Succulents
Battery operated candles
Wine Bottles x 2
Jagermeister Bottle
Pebbles (not very many are needed)
Extra soil (not very much is needed)
Extra soil (not very much is needed)
READ ALL DIRECTIONS BEFORE STARTING EACH STEP
Step One
So I was originally going to show how to cut bottles using two different techniques. One being the tile saw with glass cutting blade and two being with a "Kinkajou Bottle Cutter" where you score the glass and use hot and cold water to cut the glass along the score line. Well given my experience with number two and my small availability with time and wine bottles I've decided to just stick with the idea that works more often, my tile saw. Not saying the Kinkajou doesn't work because it definitely does, I personally have just had an overall higher success rate with my tile saw and diamond blade.
 |
| Yep, supplies. |
 |
| Safety First!. |
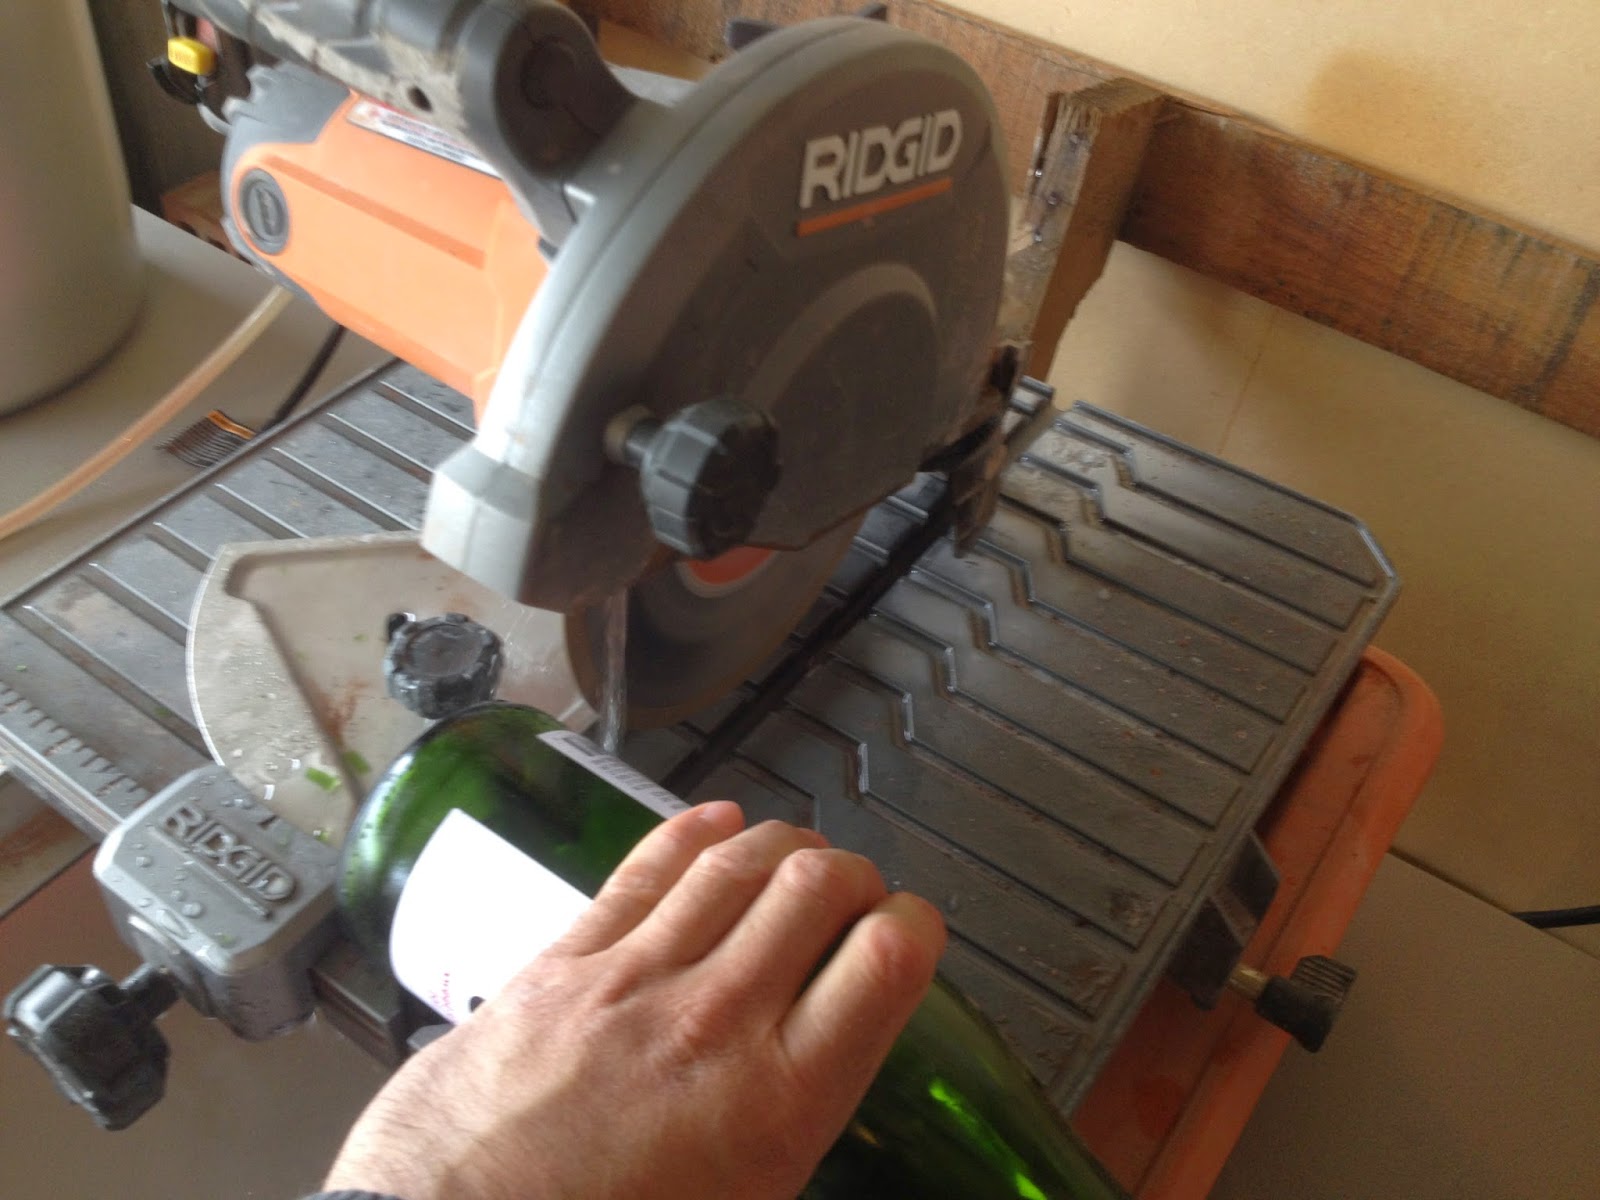
Set the fence about an inch away from my blade. This can vary depending on how tall you want your candles to be.

Set the bottom of the wine bottle along your fence and SLOWLY moved it into the blade.
Note: The faster you push your bottle into the blade the higher risk you have of it breaking or cracking.
Note 2: Also unlike me, you should probably be wearing gloves while doing this. Because glass.
 |
| Start cutting! |
 |
| Good so far... |
 |
| Welp, screwed that up. Try again slower with another bottle... |
 |
| Alright round two! |
 |
| Slowly... |
 |
| Perfect! |
Alright now that we've cut our wine bottles (I didn't take pictures of the second one because it's redundant, same process). Now it's time to cut something a lot trickier. This cut would normally be a lot easier if my tile saw had better clearance but seeing as it DOESN'T I'm gonna have to get crafty with it, I'll have to make a total of four cuts to take my side off. Determine how deep you'd like to cut into the side of your bottle then cut that side, flip your bottle and start cutting from the other side.
 |
| Line your bottle up. |
 |
| Cut the top side of your bottle |
 |
| Now flip it make your second cut |
Now turn your bottle to the other side and determine how far from the blade your first two cuts into your Jagermeister bottle were. Once you've determined that, setup your fence and start cutting the other two ends.
 |
| Measure your cutting distance. |
 |
| This is another way to determine approximately where you want to make your cut. |
 |
| Here goes! |
 |
| Not the cleanest cut ever but it'll do for what we're using it for. |
Alright so I forgot to take pictures of this step but it's pretty simple to understand and if you don't you can always message and ask me. Just take your 80 grit sandpaper, wet it, and sand all your edges. Your bottles WILL BE SHARP so this helps to soften the edges a little. You won't get it perfect, sandpaper isn't designed for use on glass so your edges will still be jagged and semi-sharp so just be careful when handling them, gloves are always recommended.
Step Six
Rinse off your bottles. Your bottles are going to have a lot of white, powdery, residual glass particles left over which looks like crap so be sure to rinse, scrub, and wash your bottles thoroughly. You may even have to use an abrasive sponge if necessary.
 |
| Flush out the insides! |
 |
| Don't forget the outside too! |
Cut off the little collar (or whatever it's called...) on your wine bottles using some snips!
 |
| Yup, pretty much what I said above. |
Take off the labels. Instead of wasting water doing the whole process of scrubbing the labels under a running sink I just decided to do it using a pot of water. Some labels are easier to remove than others. These ones weren't so easy to take off...
 |
| Start peeling and scrubbing your labels! |
 |
| Done peeling! |
Insert your juicy succulents!
Note: I made a mistake in corking the top. Don't do that. Instead you'll want to put pebbles or something similar by the top that way you can keep your soil in while also being able to irrigate your excess water, otherwise it'll just sit there
.
 |
| Succulents inserted! |
 |
| Some pebbles to add a little more zest. |
 |
| Alright done with our bottles! |
So for the life of me I couldn't find a decent tray to set these in/on anywhere so I added this step because I had to make one myself. To do this I took a trip down to Michael's and bought a long wooden plaque for about $9. I then stained and sealed it with some "Bombay Mahogany" polyurethane and stain mix, then let it dry for 6 hours. After that I reapplied and second coat and let it sit for another 6 hours. Make sure you use gloves during this step and do NOT let the stain and seal contact your skin or or eyes! Also be sure you're working in a well ventilated area. The fumes aren't good for your at all...
Note: I also have some Semi-Gloss pictured here that I ended up not using because it was already pretty glossy after the two coats. But if you're unsatisfied with the way your plaque looks after you've applied your two coats then you can always use some semi gloss to make it more shiny!
 |
| Lay out your materials! |
 |
| Apply your stain and seal! |
 |
| Make sure you get in all the grooves! |
 |
| Now let it dry for six hours and repeat! |
Congrats you did it! All that's left is to kick your feet up and enjoy the fruits of your labor! You can even invite some friends over and make them jealous of your new table centerpiece!

Follow me on Facebook to stay up to date with all my latest news and projects @
And don't forget to check out my Pinterest page too @
Plenty more cool stuff to come so stay tuned!
No comments:
Post a Comment