
Hey guys! Hope you're all having a good day! If not then maybe today's project will help brighten up your day. Today I'll be teaching you how to make a nice rustic pallet wood clock made from, you guessed it, pallet wood! It's simple, it's easy, it's cool, practical, and of course it's very bank-account friendly because abandoned pallets are generally free! So here's how it's done!
Oh wait but first we'll need some supplies...
Reciprocating Blade Saw - Equipped with a metal cutting blade of your choice.
Drill
Drill Bit - 5/16 in
Thickness Planar
Table Saw
Bar Clamp x 2
I-Bar Clamp x 2
Wooden Calls x 2
Bricks x 2
Rubber Mallet
Wood Awl
One Compass
One Clock Hand Stencil
Needle Nose Pliers
Acrylic Paint (Color may vary depending on your preferences)
Paint Brush
Number Stencils
Clock Movement <--Bought for about $7.00 at Michaels
Wood Glue
Tape Measure
Pencil
Picture Hanger Wire
Two Eyelets
READ ALL DIRECTIONS BEFORE STARTING EACH STEP
Step One
Gather all your materials!.. Although not all materials needed are shown in this picture you can reference the above list for a complete layout of what you'll need.
 |
| The coffee and lawnmower are optional. |
Take your reciprocating blade saw equipped with a metal cutting blade and saw through all the rusty nails to get your wood slats. If you think you're strong enough you can try prying the nails out, but good luck because more often than not they're in there pretty snug. Especially in the more weathered pallets that have already welled up from absorbing water. You also run the risk of cracking/damaging the wood when you do this. So yeah, in my opinion the reciprocating blade saw is the best way to go.
 |
| Saw facing away from the body! |
Hammer out your nails! These clocks only take two wood slats each. Once you've decided on which two you find most ideal for your clock lay them across your two bricks (one slat at a time) and hammer out all the nails using your rubber mallet and your wood awl just enough for you to be able to grab the end on the other side with your needle nose pliers and pull them out. You want to make sure you get all the nails out so when you run these boards through your thickness planner it won't dull the blades and fire out tiny pieces of rusty nails everywhere. Safety first!
Note: Yes I know this isn't the best use of a wood awl. Thanks!
 |
| Hammer time! |
 |
| Don't miss any! And be careful of sharp edges! |
Step Four
Using your table saw cut your wood slats to size (about 14 inches long). If you did this right you should have four 14 inch boards.
Note: You want your clock to be as close to a perfect square as possible. Some boards may be wider than others. To counter that just line your boards up beside each other and measure their combined width then multiply that times 2 and that's how long you're going to cut them. It's usually right in the ball park of being 14 inches long.
 |
| Mark your cuts. |
 |
| Make sure you account for the kerf of the blade! |
 |
| Start cutting! |
 |
| You should now have something like this. |
Step Five
Run your boards through your thickness planner on one side until they're all about 1/2 to 3/4 inches thick. This can vary depending on how deep your clock movement is. Just make sure that you plane it enough so that you'll be able to thread and tighten the the nut on your clock movement.
 |
| Get your planer ready! |
 |
| Start running your planks through the planer. |
 |
| Make sure you plane thin enough to fit your clock movement through. |
 |
| Your planks should all now be the same thickness. |
Step Six
Alright this one's pretty easy and straight forward. All you have to do in this step is glue and clamp all your planks together, then let them sit for two to four hours. See, easy!
Note: If you don't know what a wooden call is, it's essentially just a piece of wood wrapped in scotch tape. Make sure it's completely covered though otherwise it'll get glued to your clock. If you glue your calls to your clock you're gonna have a bad time.
Another Note: Wood glue is very fast acting so be quick!
 |
| Gather your clamps, calls, and glue! |
 |
| Figure out how you want to arrange your planks. |
 |
| Generously apply wood glue to the sides of three of your planks then clamp them tight. |
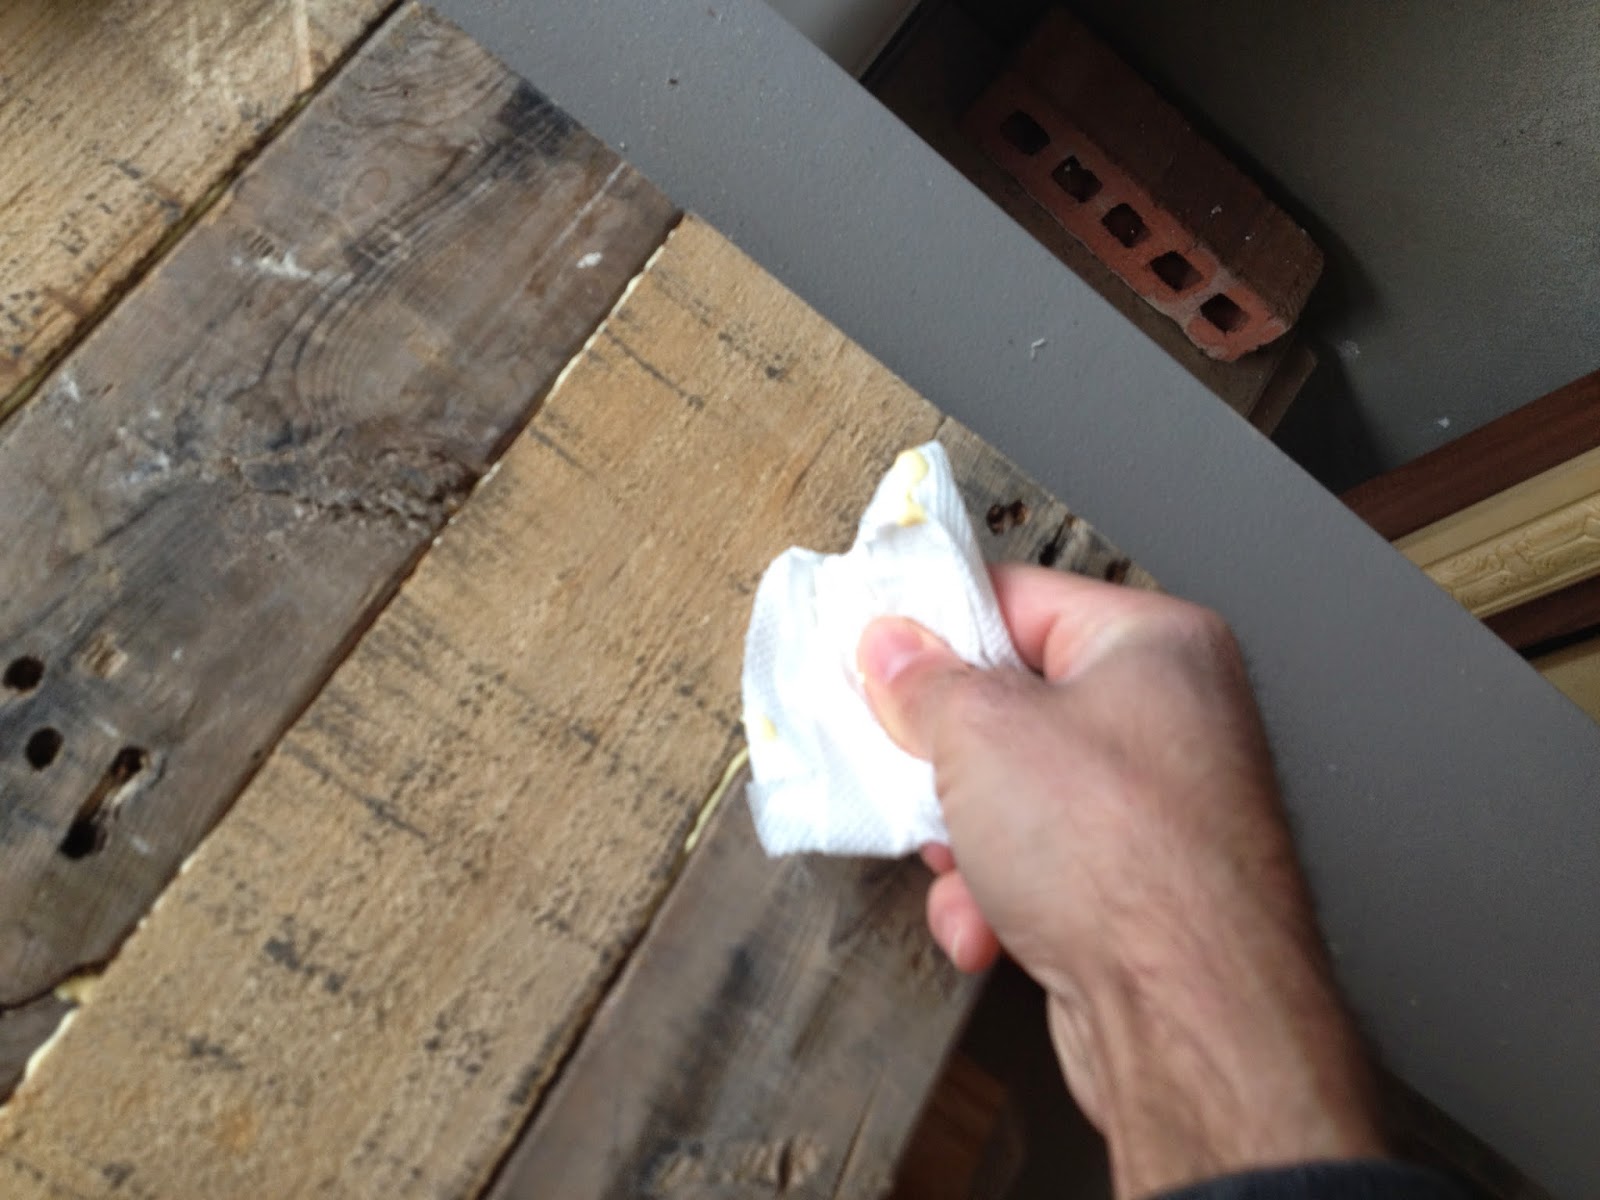 |
| Wipe off any excess glue that bleeds out. |
 |
| Place your calls above and below your planks then clamp them together with some bar clamps. |
 |
| Don't forget to wipe off the back too! |
 |
| Alright now let it sit for 2-4 hours. |
Step Seven
Measure out the center of your clock then mark and drill out a center hole for your clock movement using a 5/16 size drill bit. Then insert your clock movement and secure the nut over the threading.
Use a clock number template (you can just google image "clock template" and print one out) to mark where you'll paint each of the numbers. You'll want to do this at least five inches out from the center.
Note: I made my own little compass marker thingy out of a small strip of wood I had lying around. I drilled one hole on the end then I drilled a hole for every inch out after that. If you're confused just look at the picture below. If you're still confused contact and ask me. If you're STILL confused after that you probably shouldn't be using power tools.
Note: I made my own little compass marker thingy out of a small strip of wood I had lying around. I drilled one hole on the end then I drilled a hole for every inch out after that. If you're confused just look at the picture below. If you're still confused contact and ask me. If you're STILL confused after that you probably shouldn't be using power tools.
 |
| Measure out the center of your clock. |
 |
| Start drilling! |
 |
| Push your clock movement through and tighten down the nut. |
 |
| Use your clock template and "compass" to mark the spots for your numbers. |
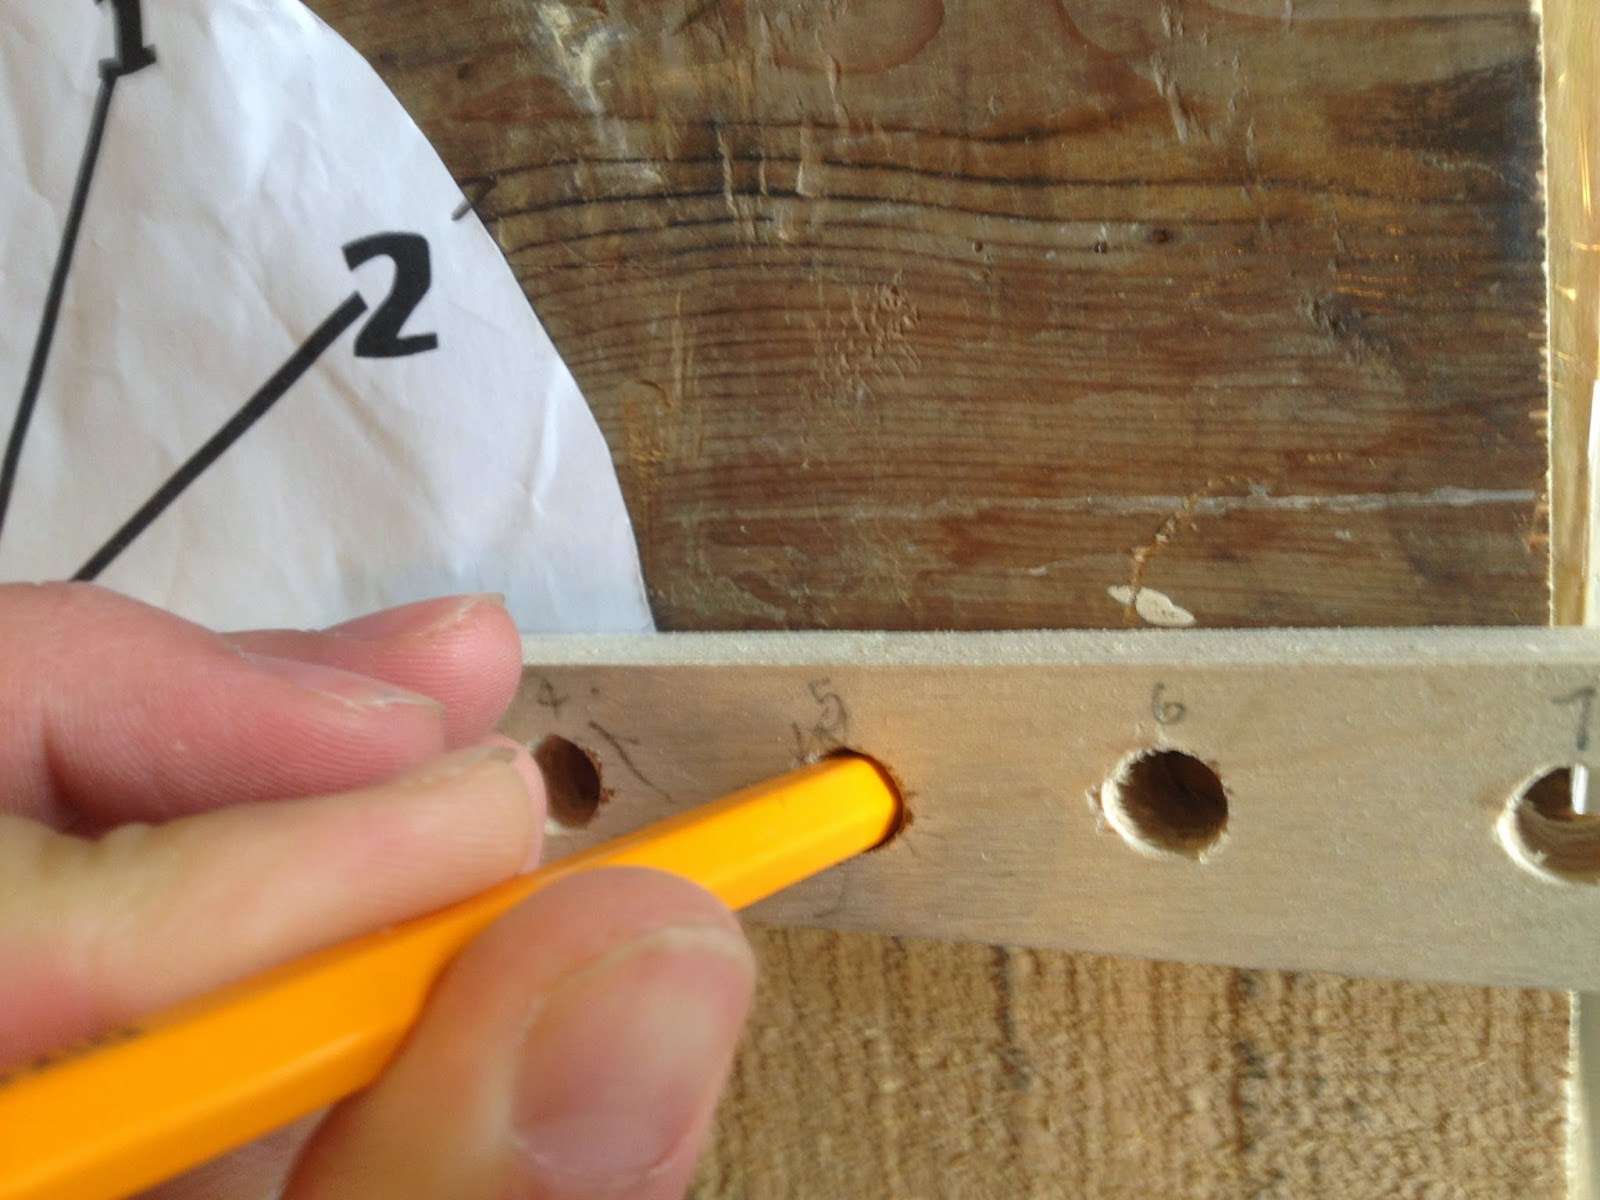 |
| Don't forget to make sure they're all five inches out. |
Step Eight
Now the easy part, paint your numbers! You can use any number stencil found at Walmart or Michael's to do this. I recommend using acrylic paint and applying it with a thin bristle brush. I tried using spray paint but it was too runny and ended up making a big mess.
 |
| Line up your stencils! |
 |
| Start painting! |
 |
| Now let it dry for a few minutes. |
Step Nine
Make two 6 inch long, 1.5 inch wide support brackets for the back of your clock using any leftover pallet wood you still have. Screw in your two eyelets to each bracket (one each), these will be used for your hanger wire. Then glue them to the left and right of your clock movement, apply pressure and let them sit for a couple hours. Once the glue has cured run the hanger wire through your eyelets and add the clock arms according to the manual that came with your clock movement!
Note: Your brackets should come out farther than your clock movement, otherwise your clock will look lopsided and crooked.
Note 2: Make sure you don't put the brackets on the clock with your eyelets on the bottom end... It'll end up being upside down. Yes, it's happened.
 |
| Mark where you want to cut your wood. |
 |
| Start cutting! |
 |
| Keep cutting! |
 |
| Start screwing in your eyelets. |
 |
| Start gluing! |
 |
| Apply pressure and let sit for 2-4 hours while you go relax somewhere. |
 |
| Run your hanger wire through your eyelets. |
 |
| Add on the clock arms and secure the final nut. |
Step Ten
Hang up and enjoy the fruits of your labor! You did it!!! Unless you just skipped all the way to the end and didn't even bother making the clock at all. If that's the case then here's a pretty picture! Enjoy!

Follow me on Facebook to stay up to date with all my latest news and projects @
And don't forget to check out my Pinterest page too @
Plenty more cool stuff to come so stay tuned!
No comments:
Post a Comment