Hello everyone and welcome back to my blog Rustic DIY Projects! Hope you're all having a good week and hopefully this project can help make it even better! So late last week I was browsing stuff online and I came across some pretty cool shelves, hat racks, and towel racks made with wood and piping. So after having made my coffee table I decided it was time to try out another industrial/rustic style DIY project! I like capitalizing on vertical space so I decided to make another shelf this week and use piping to give it a bar so it can act as a towel rack as well! After putting in the work this is how it turned out! Hope you enjoy!
Supplies I used for this project are listed out below.
Table Saw
Orbital Sander (150 grit sandpaper)
Drill
Drill Press
Drill Bit (9/64 in)
Router
Router Table
Key Hole Bit (7/16 in)
Bar Clamps x 2
Deck Screws (1-5/8 in) x 4
Pan Head Philips Screws (5/8 in) x 8
3/4" Flange x 2
3/4 " Elbow Joint x 2
3/4" x 1" Nipple x 2
3/4 " x 12" Nipple x 1
1" x 8" x 4' Board of Wood
Wood Glue
Bombay Mahogany Stain and Seal
Respirator
Gloves
READ ALL DIRECTIONS BEFORE STARTING EACH STEP
Step One
First I measured my out my cuts. Since this is only going to be a shelf/towel rack it doesn't need to be super big so I cut both the shelf and the backboard to 18.25 inches long. Then I ripped the backboard to be 7.25 inches wide and the shelf to be about 4.75 inches wide. Sorry but I forgot to take a picture of this step but it shouldn't be too hard to conjure up a mental picture.
Backboard = 18.25 in long, 7.25 in wide.
Shelf = 18.25 in long, 4.75 in wide.
Step Two
The board I bought was already pretty smooth so I skipped the 80 grit and went straight to 150 grit on my orbital sander.

After my boards were nice and smooth I assembled the bar for the towel rack. For this I decided to go with 3/4 inch piping because I didn't want it to be too heavy.
 |
| Before... |
 |
| After! |
Time to glue the shelf to the backboard! Using some wood glue and two bar clamps I attached the shelf to the board, clamped it in place making sure to clean any excess glue that oozed out, and let it sit for four hours!
 |
| Picked my spot now I'm gluing it up! |
 |
| Not the right way to use a respirator but hey, whatever works! |
After the glue cured I pre-drilled some holes so I could reinforce the shelf with some deck screws (can't just have glue on this otherwise you run the risk of it falling apart). I used a 9/64 in drill bit and some 1-5/8 in deck screws for this step.
 |
| Helps to mark your holes first before drilling. |
 |
| This should hold. |
Once everything was all screwed in nice and tight I sealed it with two coats of Bombay Mahogany stain and seal.
 |
| Staining it up! |
 |
| Now to let it sit until it dries. |
After it was all dried up I screwed in my flanges using 5/8 in screws, I used eight of them.
 |
| Make sure your screws aren't too long. |
Alright almost done. All that's left was to route a key hole in back using a 7/16 inch key hole bit.
Note: The fence I set up is optional but highly recommended as it helps to keep your key hole perfectly centered.
Note 2: Make sure to wait until the bit is completely stopped until you pull your wood off otherwise it'll screw everything up and your shelf is worthless now.
 |
| Got my fence set up and my router ready. |
 |
| Slowly set the back down on the bit and slowly pull back half an inch. |
 |
| Looking good! |
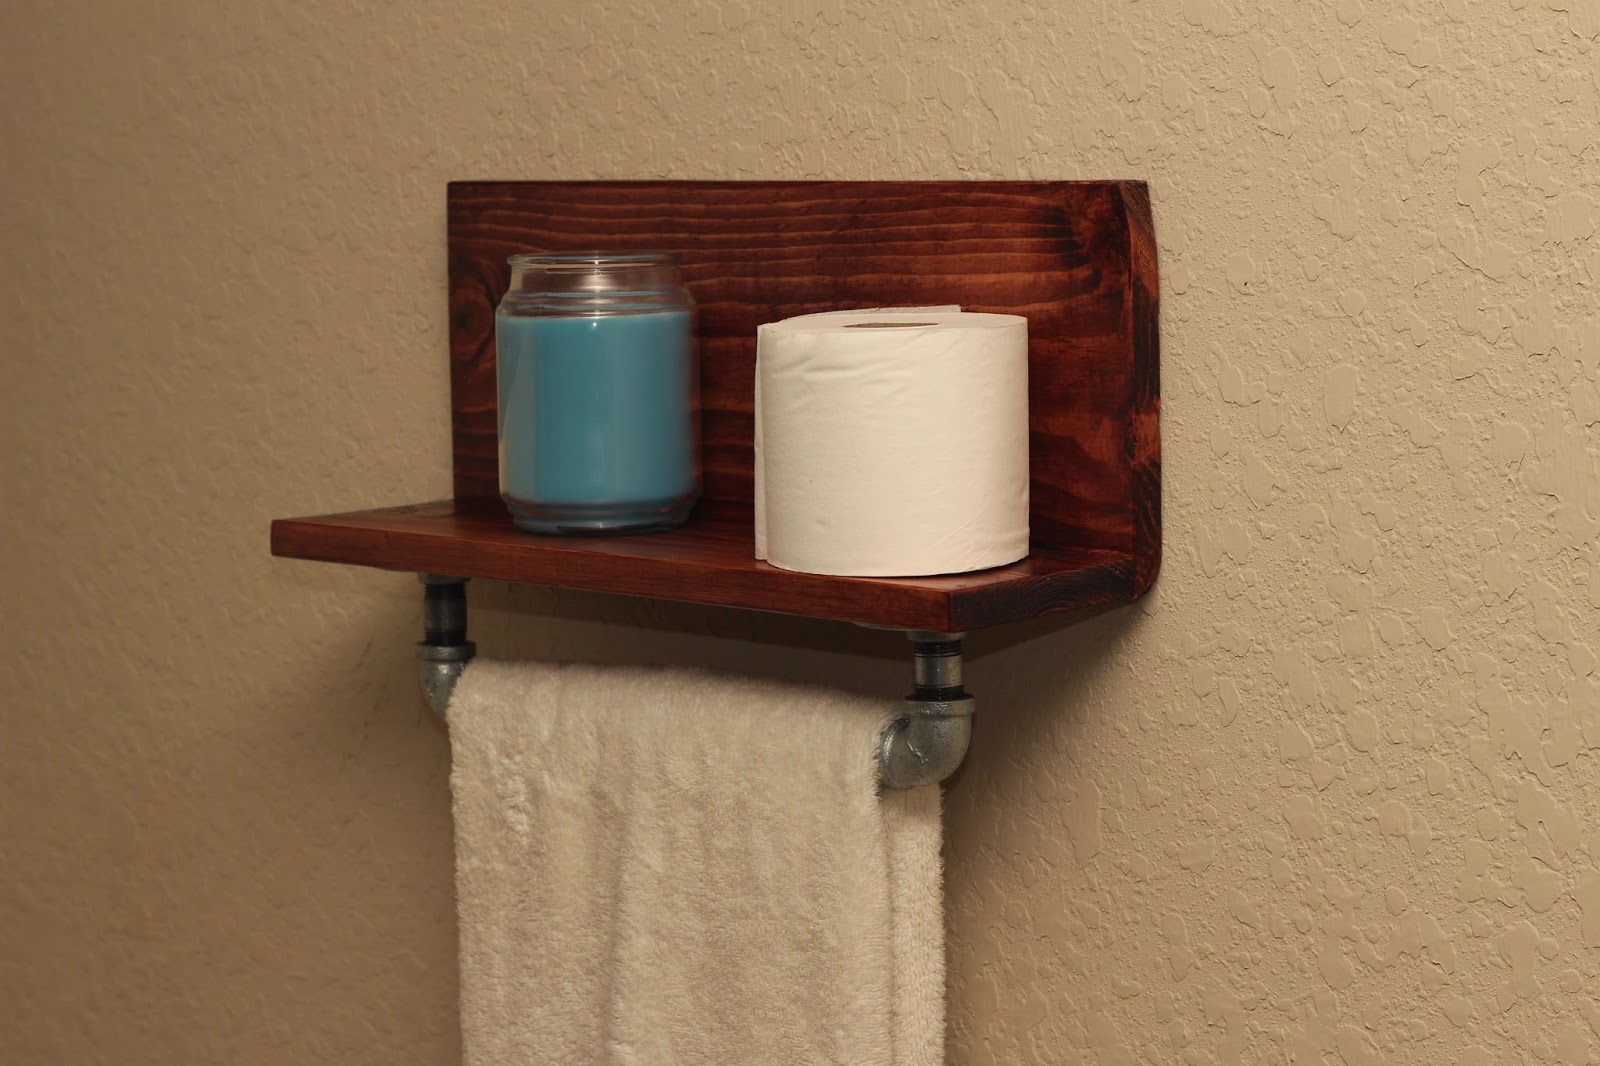
All done! Never will I have to worry about running out of toilet paper as I have a fresh new roll right there!

Hope you enjoyed my "How To" on how to make this rustic, industrial style towel rack and shelf! Feel free to share this link with any of your other friends you think may be interested! Also don't forget to like, share, and follow me on social media! It helps! And don't be afraid to share what you made either! I like to see what kind of cool stuff other people come up with! And if you have any questions, concerns, or remarks you're more than welcome to leave a comment in the comment tab or my email if you want to do so more personally!
Follow me on Facebook to stay up to date with all my latest news and projects @
https://www.facebook.com/rusticdiyprojects
And don't forget to check out my Pinterest page too @
https://www.pinterest.com/rusticDIYpro/
Follow me on Facebook to stay up to date with all my latest news and projects @
https://www.facebook.com/rusticdiyprojects
And don't forget to check out my Pinterest page too @
https://www.pinterest.com/rusticDIYpro/
Plenty more cool stuff to come so stay tuned!
This comment has been removed by the author.
ReplyDelete