
Hey everyone! And welcome back to Rustic DIY Projects! And if this is your first visit then welcome to my blog! Where I make neat stuff and teach you how it's all done! This week's project is fairly simple, easy, and inexpensive to do! I've seen this idea online, thought it looked cool so I tried it out on some wine bottles I had lying around the garage and it actually came out pretty well. So if you're a wine drinker looking for something you can do with those empty bottles then this idea is perfect for you! See below for how it's done and share it with anyone else you think may be interested!
Also BIG SAFETY ITEM, make sure any and all of your string lights are unplugged at all times while you're working with them. If they're plugged in while you're following these steps you WILL get shocked! So think safety first and make sure your lights are all unplugged until you're finished.
Supplies I used for this project are listed out below.
Note: You'll see in the steps that the light strings are different colors. This is because I forgot to take pictures with the first two bottles (using green light strings) I worked with and the third bottle I DID use was done with a white light sting. No need to be alarmed, the same steps apply.
Drill Press
Electroplated Diamond Core Drill Bit (1/2 inch)
Wire Stripper
Heat Shrink Tubing
Lighter
Solder (optional)
Soldering Iron (optional)
String Lights
Water
Wine Bottle
Safety Glasses
Respirator
READ ALL DIRECTIONS BEFORE STARTING EACH STEP
Step One
After donning the proper safety attire (safety glasses and respirator since I'm working with glass) and making sure my power cable wasn't anywhere it could get wet, I set up my drill press with a small container to hold the water and wine bottle. I then inserted my electroplated diamond core drill bit into my drill press chuck and drilled a hole into the bottom back side of my wine bottle, making sure to keep the drill hole wet.
Note: Anytime you're cutting, drilling, or grinding glass you'll need to keep a steady stream of water flowing onto it or make sure the glass itself is submerged. This was the deepest container I could find for my wine bottles. I also didn't feel like going out and buying a water pump but you could just as easily do that.
 |
| Got my drill bit loaded in. |
 |
| It wasn't easy keeping the bottle submerged while drilling... |
 |
| Finally got my hole. |
Step Two
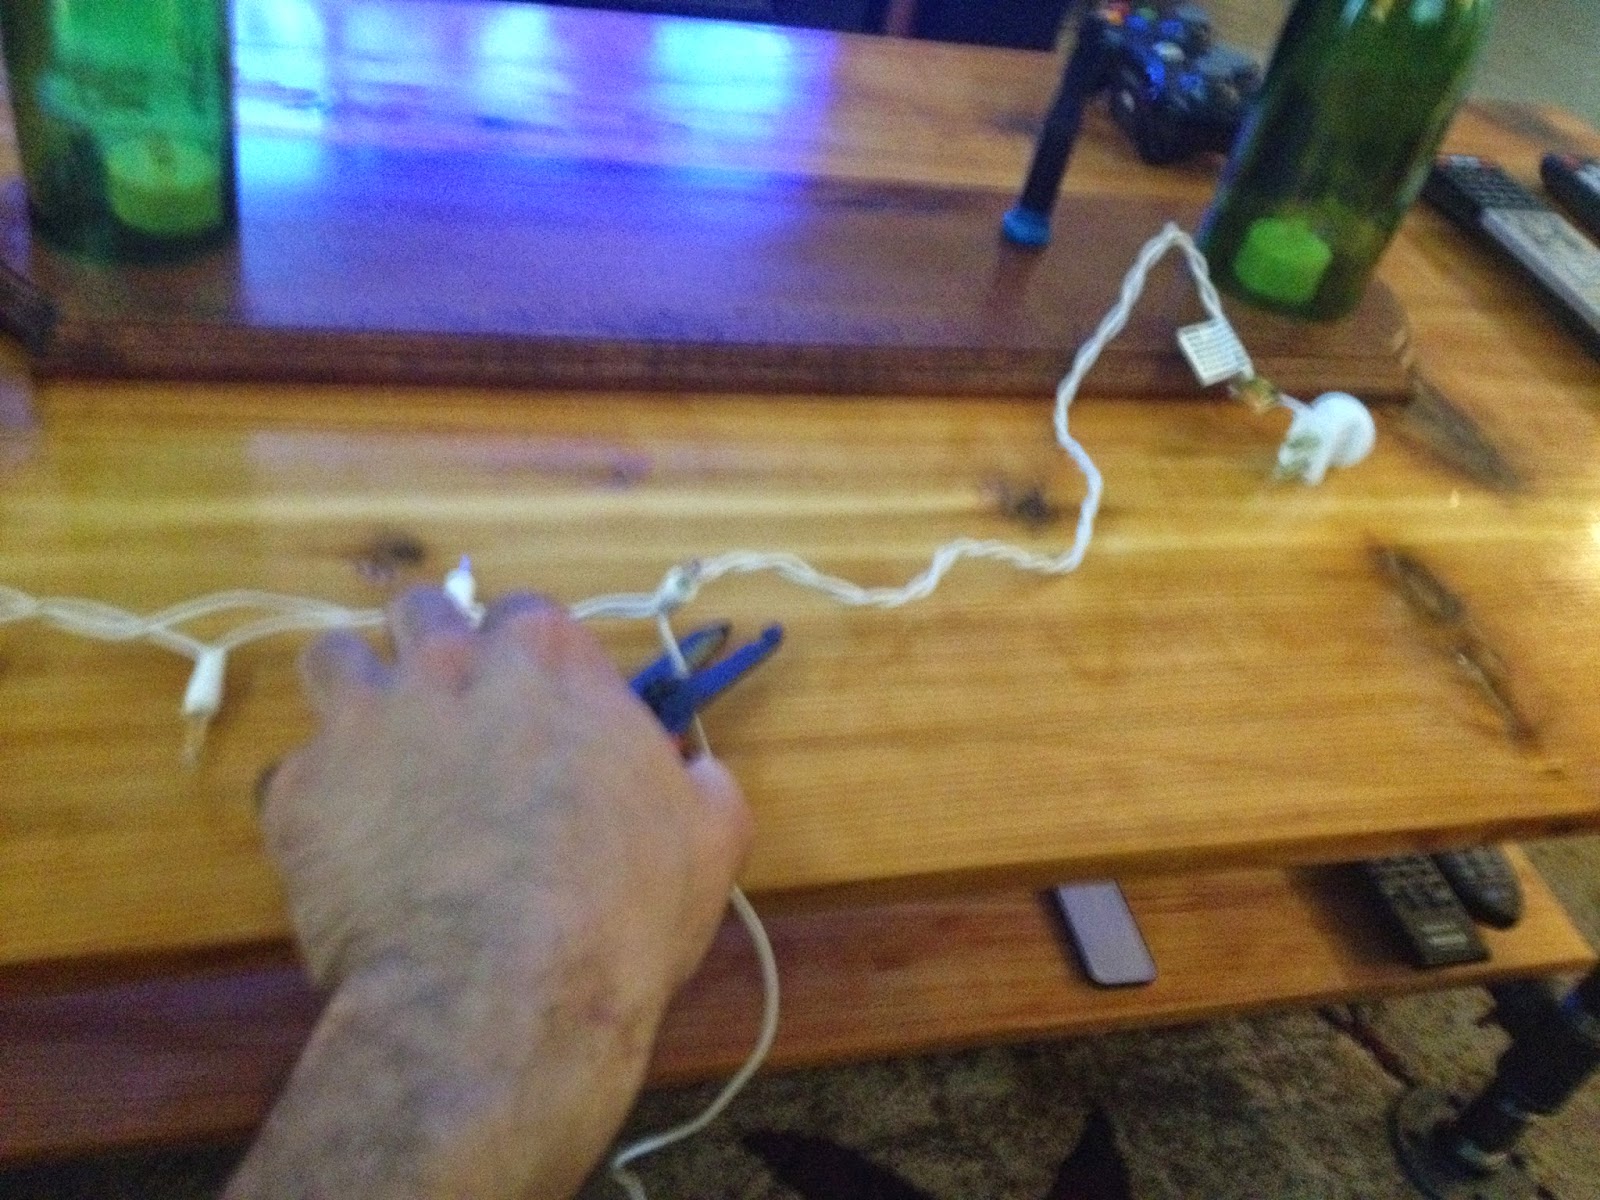
Alright so this step got kind of confusing. I guess string lights have three wires instead of two (my guess is for redundancy) once you get past the first light bulb so I had to trace the wires out and find which one(s) to cut. The two wires you want to keep are the one that goes from the plug to the first light and the one that goes from the plug to the very last light. HOWEVER somewhere around the mid point of the string that second wire plugs into a bulb in the middle, which confused me but like I said earlier, it's for redundancy. So what I did was just cut it at the middle (the full string was too big to fit in my bottle anyways) and made two separate strings. So to make this step more simple just do this:
- Find and cut middle of string of lights.
- Find wire that goes from plug to first light (keep this one).
- Find wire that goes from plug to last light (keep this one).
- Cut remaining wire and isolate it with heat shrink tubing.
- Use wire stripper to strip ends of both wires, slide heat shrink tubing on, twist the copper cores around each other, apply solder (optional but I did it and it worked well), slide heat shrink over exposed copper cores and heat it.
Note: If you've never dealt with heat shrink tubing, it's basically a little tube you slide over a wire/cable with an exposed core and you heat it with either a lighter or a heat gun to shrink the tubing over it so it won't be exposed anymore. Same with when you cut and combine two wires/cables. This reduces your shock risk and helps keep everything connected.
 |
| Finding my third wire while watching Terminator 2 again. |
 |
| And now it's gone because I don't need it anymore. |
 |
| Had a weird extra light I didn't need so clipped that off |
 |
| Now I'm heat shrinking any exposed cut wires. |
 |
| And that's the last one! |
Step Three
Hard part's over! Now all that's left is to run all your lights through the hole. Be gentle as the hole will probably still be a little sharp. You may even want to put a grommet over it.
Note: You should probably go ahead and test out your string of lights before you start pushing them through the hole, that way you can be sure all your bulb's are good. Once they're in the bottle they can be a pain to take out.
Note 2: If you're worried you might get zapped due to a crappy wiring job (like I was) you can plug them into a power strip with the power switch in the off position then simply turn on the power strip to see if they light up or not. Just in case this is your first time messing around with electrical stuff it never hurts to stay on the safe side.

Step Four
Find a spot you'd like to put it and enjoy!

Hope you enjoyed my "How To" on how to make these cool wine bottle lights (or lamps I guess)! Feel free to share this link with any of your other friends you think may be interested! Also don't forget to like, share, and follow me on social media! It helps! And don't be afraid to share what you made either! I like to see what kind of cool stuff other people come up with! And if you have any questions, concerns, or remarks you're more than welcome to leave a comment in the comment tab or my email if you want to do so more personally!
Follow me on Facebook to stay up to date with all my latest news and projects @
https://www.facebook.com/rusticdiyprojects
And don't forget to check out my Pinterest page too @
https://www.pinterest.com/rusticDIYpro/
Follow me on Facebook to stay up to date with all my latest news and projects @
https://www.facebook.com/rusticdiyprojects
And don't forget to check out my Pinterest page too @
https://www.pinterest.com/rusticDIYpro/
Plenty more cool stuff to come so stay tuned!
No comments:
Post a Comment